Thursday, July 31, 2014

Laundry Room Makeover


Buying your first home is super, duper exciting. After years of sinking money into a rental, I was so happy to have a place of our own. We could actually paint the walls a color I wanted. I mean, Husband got to voice his opinion too, but it didn't go far. I wasn't trying to be a controlling bitch, but as a bachelor, his definition of decorating included a bottle of WD40 on the bookshelf. I’m not even kidding.

So we purchase our new home and I decide to tackle the laundry room first. Why? Because I spend far more time than I care to admit in that tiny area behind the kitchen. There’s so much damn laundry. The walls were naked, the giant water heater is an eye-sore, the utility sink looks gross … it was just not working for me. Let the makeover being!


I chose Tiffany blue for the walls. I’m completely in love with the color. I literally took a Tiffany’s box to Home Depot to match the color. It was perfect. Hubby and I got the whole room painted in a weekend. I'm glad we started with this room too, because if you've never painted a room before, the laundry room is a good one to start with. 

The previous owners had put a shelf up, but it wasn't mounted in studs. I buy the Sam’s Club size laundry detergent, which is fairly heavy, so a sturdy shelf was necessary. Hubby replaced the old shelf with a sturdy, thick, white shelf and black brackets. I also bought a cookie jar for about $5 at Walmart which I use to put OxyiClean in.


Now I’ll admit that I have no clue how to sew so making a skirt for the utility sink myself wasn't going to happen. I searched online for them too, but I was not about to pay $50+ for one either. What the hell did I make the skirt out of then? I used double stick Velcro and a black curtain panel that I got on clearance at Target. Stick one side of the tape to the outside of the sink and the other to the curtain. Boom. $10 sink skirt.


I also added a mirror behind the sink and a shelf to the wall on the left for storage. I also grabbed a bath towel and hand towel at Target for the shelf. And, of course, a few fake flowers on the sink with some hand soap.

To help hide the water heater and central vac, I put up a tension rod with two more black curtain panels and one pretty panel with a black and white chandelier design. I can’t find the link for that specific panel anymore, but Target sells a similar one. I also had Hubby put up a few hooks on the right wall and used two of my wooden hangers because they're pretty and functional.


Total Time: Weekend Project
Total Cost: Around $200


xoxo
Jessie

Wednesday, July 30, 2014

Saving Our Deck


We saved our deck with composite railings &
painted it with Rustoleum Restore (in Lagoon)

Its February 2014. My husband and I are standing side by side, deep in thought starring out the back door at our deck. Our miserable, splinter-giving, wood-cracking, railing-failing deck. It's a total piece. of. crap. We know what’s coming, but the task seems incredibly overwhelming. The deck needs to be cleaned, stripped, re-painted and the railing needs replacement.

We will ultimately do all of the work ourselves, but before that decision is made, I inquire about some quotes from local contractors. Multiple contractors never even show up after our scheduled appointment. One showed up and never got back to us. The quotes that we did manage to get (for just the railing) range from $2,000 to $2,850. Our budget for the entire deck (railing AND painting) is $2,500.

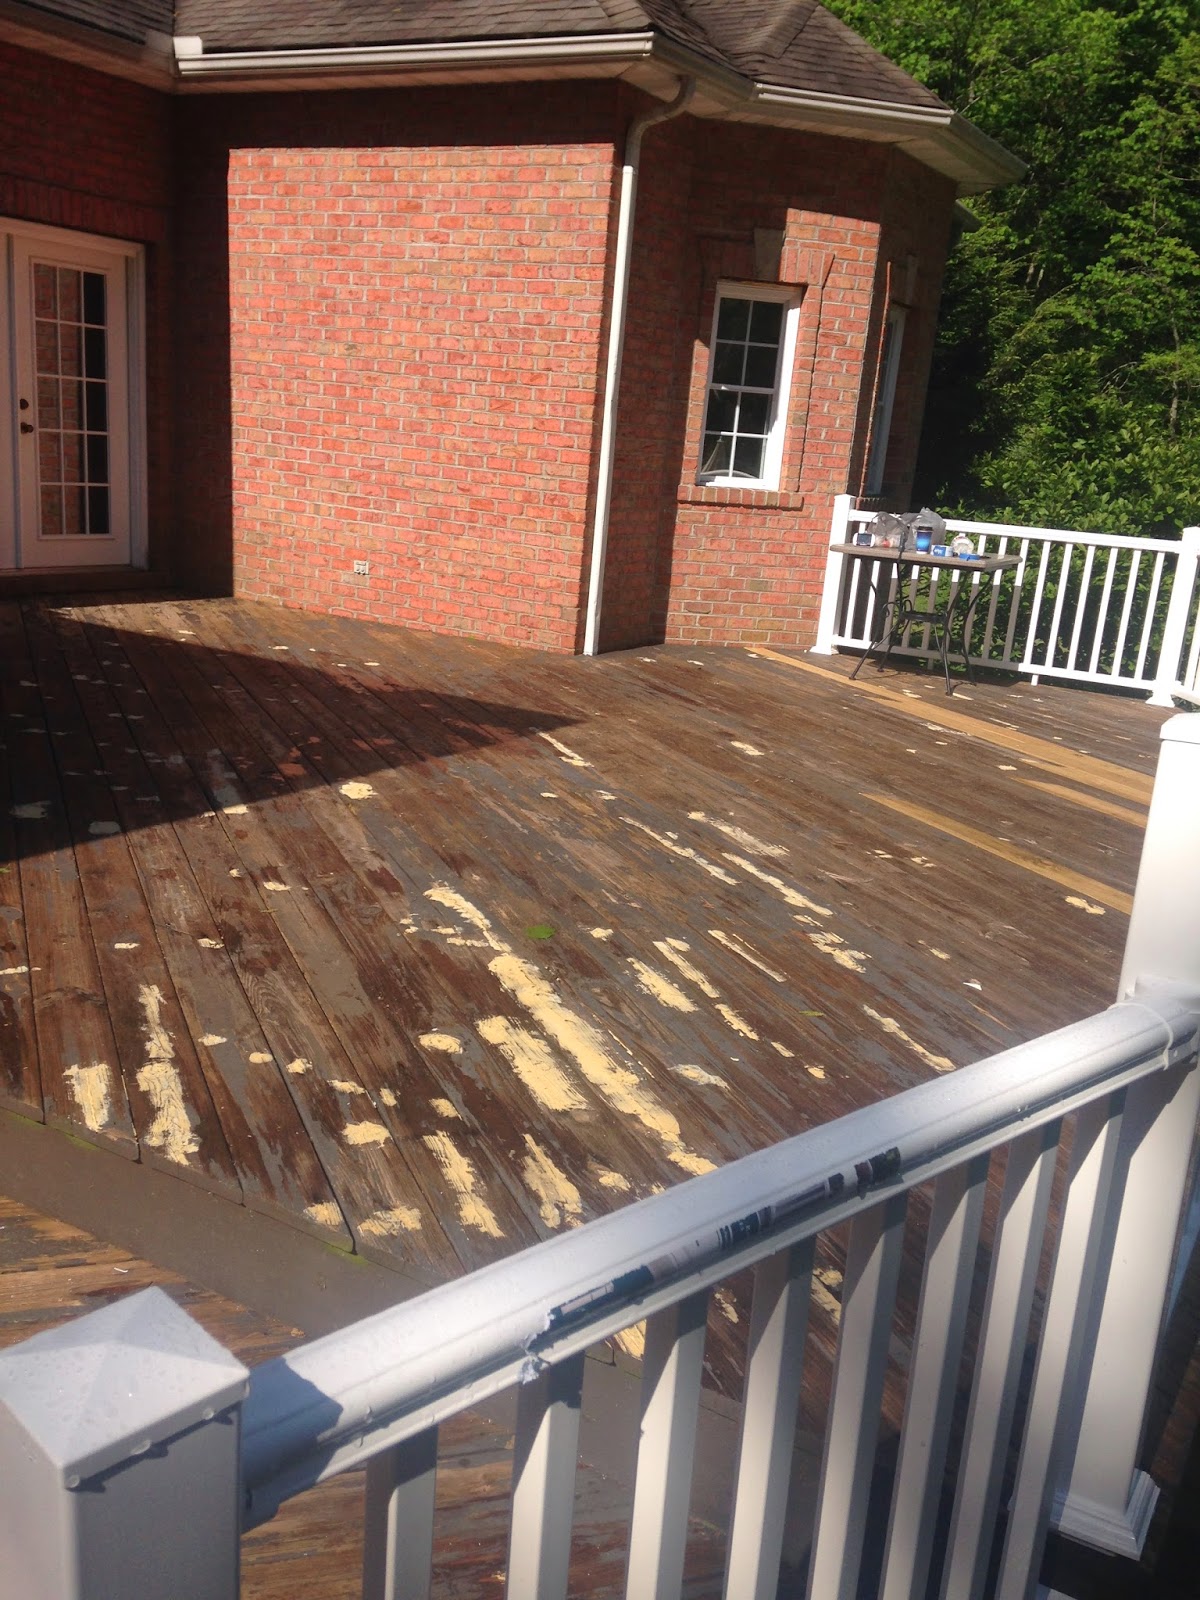
Old deck. It was even worse than this by the time we fixed it!

Okay then. We’re doing this ourselves.  But if we’re doing this, we’re doing it once. That’s all. So after doing some research online, we decide on composite railing. Why composite railing? It’s low maintenance, it’s easy to install, it’s durable, it doesn't need painting and it comes with a limited lifetime warranty. It’s basically the best thing to happen to decks ever in life. Ever.

So Chris and I take some measurements and I draw up a blueprint of the deck. I recommend doing this. I’m a super visual person and numbers scare me so having something to reference is essential. We figure out how much of which type of railing we will need (railing comes in 6 and 8 foot sections). We’ll also get post jackets that slide over the existing wooden posts, base trim parts, post tops and all the pieces for the stairs. 

Blueprint of our deck railing. Very helpful!

We purchased the Veranda Traditional Railing from HomeDepot.com. Our total for everything is $1,282.08 (tax and shipping included). While we're waiting for our railing to show up, we start on the deck. We head over to Ace Hardware for replacement boards, deck screws, stripping agents, deck cleaner and wood putty. We probably spent another $200 or so there. Tearing down the old railing was unsettlingly easy. Chris cut up the railings with his new circular saw and put em' in our fire pit.

The cleaning and pressure washing begins.

Our plan is to clean, strip and paint the deck before we install the rails. However, we’re repainting the deck with Rust-Oleum Restore. Per the directions, “DO NOT APPLY IF RAIN IS EXPECTED WITHIN 48 HOURS OF APPLICATION. Apply when surface and air temperature is between 50 and 90 degrees F for a full 72 hours (day and night).” 

Well … Shit. 

It’s April in eastern Kentucky. It rains. A lot. This changes up our plans, but everything works out. We spend 4 weekends cleaning, power washing, stripping, sanding, replacing boards and filling in cracks with wood putty. (This would have probably taken a LOT LESS time, but we have a baby, so that complicates everything.)

Umm also, please wear jeans and work boots when you strip your deck by power washing. Splinters will fly up and attack your legs and it will hurt.


Wearing shorts while power washing
is not a good idea.
Our railing shows up during the cleaning/stripping process, so after the deck is prepared, we install the railing (which we can actually do in the rain). It takes a while to figure out, but once we get one railing in, the others are easy as pie. 

New railing shows up! Yay!
We watched a few YouTube videos beforehand, and Lowe's has a How-To section on their website where you can download instructions. Chris actually put most of it up himself. I helped a little. I hand him screws and held the power drill.


Then it was onto painting. We used Rust-Oleum® Deck &Concrete Restore® 10X in Lagoon.  It’s a beautiful blue. It’s nontraditional, but I love it. If anyone tells you that decks should be wooden colored only, tell them to suck a rainbow. I’m a little nervous though, because reviews vary for this product. Some people love it. Others hate it. It worked for us. It’s thick and covers cracks, lays down splinters, hides imperfections and it is weather-resistant.


We’ll need 10 three-gallon buckets of this stuff. At $69.00 a piece, it will cost us $690. LUCKILY, Lowe’s was having a spring special (it’s May) for $10 off, so we get a $100 check back in the mail about six weeks later. So really, it was $590. We still have a full bucket and a half in the garage too. That’s after we used two coats.

We also purchase honeycomb rollers, painter’s tarp (to cover the railing), duct tape to protect the brick, and the other usual painting materials.

It takes us two weekends to complete the painting due to baby demands and uncooperative weather. You guys, I was so sick of seeing blue paint by the end of this. All the while, our deck furniture littered the backyard. We looked pretty white-trashy. 

Our total cost is around $2,200. That includes all the railing, hardware, Restore and painting supplies. We splurge around another $300 for a new table umbrella, rug, deck box and swing cushions. I'm very happy with the railing and the paint. Even better, we can actually walk on it. Without shoes!


Tips from my experience:


RAILING: I paid the $55 for shipping to get all the railing sent to my house. Well worth it. It's a lot of material and it's heavy. 

DIRECTIONS: Read the directions and follow them exactly for the Restore. Do not think that this paint will stick to a painted deck. It won’t. You have to follow the directions. I’ll say it again. You have to follow the directions. There is one spot on our deck where I just couldn't get the previous stain up and the Restore chipped right off. The rest of the deck is fine because I got all the stain off.

HONEYCOMB ROLLER: Those honeycomb rollers are kind of a pain-in-butt. They really don’t last as long as you’d expect because the material is so thick. Buy a few of them and be sure to watch them as you’re rolling on the paint. When pieces of the roller start coming off, change it out for a new one or they will stick to the paint and be stuck on your deck. It’s not cute.

SAVE: If you have a large deck, scope out multiple stores (Ace, Home Depot, Lowe’s) for rebate specials. Restore is expensive and any little bit of savings can really help.

RECYCLE: The painter buckets that the Restore comes in actually clean out very easily. I ended up cleaning them out, spray painting them, printing out some labels and using them as garage storage after we were finished.

GIVE IT A TRY: My husband majored in Chemical Engineering. I majored in Journalism. Neither of us have any experience with carpentry. But we were able to get this job done and I'm super proud of both of us for it. So if you're scared, well, stop being scared and give it try.


As always, I hope this provides some sort of helpful or inspiring information. 

xoxo
Jessie

Tuesday, July 29, 2014

Bad Granite Install


It’s February of 2014 when Hubby and I decide to take the plunge and upgrade our kitchen countertops. Our home came with green Corian and a 10 year warranty. The house was built in 2001. We purchased the house in 2011. The Corian started cracking in 2011. (Insert bad word here. The one that starts with F).

Hoping to someday sell our home and walk away with some profit, we purchase granite countertops from the big-name, orange-box-home-improvement store. They were having a 10% off sale so we jumped on it. Our total price including 68 square feet of granite, eased edges and labor was $4,446.00 minus the 10% discount = $4,001.40.

Why did we decide on granite? It’s beautiful, it’s easy to clean, it’s heat resistant, it’s scratch resistant, it’s a long lasting material and it came with a 15 year-warranty. (At least ours did) 

Who needs a savings account in their late 20’s anyway, right? It’s okay though; we've spent money on far less useful things in the past. Not that much money. But money.

Well it turns out the orange-box store subcontracts their parts and labors out. We were dealt the crappy hand of a company I’ll call “Zero Star.” (That’s not their actual name, but I’m not here to slam them. I just want to inform others about what to look for in a bad installation). I could write out the entire ordeal, but it’s such a hassle that I’ll spare you the details and give you the summary:

The installations were awful. Notice that “installations” is plural. All-in-all, Zero Star and Orange-Box store had to come out 13 times. There were multiple templates, multiple installations, multiple attempts to cover horrible work, and even a few meetings with the owner of the company.

Anyway, I am obviously not a professional contractor and this was my first experience having granite installed in my home. However, for those of you looking to replace your countertops with granite, here’s what I hope you look for:

Gaps: According to Residential Stone Countertop Installation standards set forth by the Marble Institute of America, “Visible joints between the stone unions and other materials (like the wall in this case) shall be 1/8” nominal, with a tolerance of +/- 1/16”. This allows a maximum distance of 3/16.” Zero Star was much more proactive in returning my calls after I sighted the MIA. Interesting ... huh?


Gaps - part of the granite in the wall and part 1/2 inch away.
Gap - granite almost 1" away from the wall.
Seams: If your seam is visible from across the room, it’s not a good seam. They should be barely visible. In my case, two of the seams were close to perfect. You can see photos below of the third. “With stone seams they are not sealed like smooth glass. You will always feel and see them and flour can get on the surface and appear to be stuck.” –Zero Star (via email, Friday, May 09, 2014 10:39 AM) Please do not allow your installers to walk away from the job if you can get flour in the seam. This guy had no idea what he was talking about. The photo is clear, you can see how it’s a trench. All four photos below are of the same seam through multiple installs. It was a problem.

On that note: I was informed that I was not the only customer with problems with Zero Star. Apparently, they also put a seam over a dishwasher. Please do not allow your granite company to put a seam over a dishwasher. Granite is extremely heavy and there's no support under dishwashers. Not to mention the the amount of heat a dishwasher can put out which can add to the breaking of the seam.


At one point the seam broke apart!
Flour stuck in the trench.
Thick seams are ugly.
They replaced a bad seam with an ugly chip.

Chips: Zero Star informed me that “fissures” are common during installation. Whatever. Don’t let your installers get away with giving you a slab of granite with multiple, noticeable chips in them. You've paid too much damn money for that.

Chips happen. But multiple chips? No.
Look for chips in the sink lip!


Wall Damage: Zero Star said, “Any time that we install or remove granite there is the chance of damaging some walls and those are considered minor incidental damages as part of the construction.” (via email Tue, Apr 22, 2014 at 6:47 AM). Okay, so I’m told to expect wall damage. Not the worst thing because I can fix most of it myself with some plaster and paint. However, when your wall has been cut and damaged so badly that you’ll HAVE to do a backsplash just to cover the plaster and paint … that’s not good.

Wall Damage ...
In attempts to smooth over a chip in the granite, the installers took the grinder to my wall.
They cut into the wall and the granite isn't even in the wall.


Cabinets: You should absolutely not be able to see the cabinets underneath the granite. That happens only if the template was wrong, the cutting was wrong or the installation was wrong.  

If your granite does this, that's not good.
  
Overhang: Overhang means that the granite should hang over the cabinets at the same distance around the entire kitchen. So you don’t want to have one cabinets where the granite is out three inches and another part where it’s out two inches. One of the installers informed me that the granite should be cut and installed so that the edge sits right above the cabinet line for the edge. I don't know if that's total bullshit, but okay. I'll play. If that's true then, the slab on the right of the stove was cut too long. Either way, it made the stove look uneven. The President of the company shoved some contractors shims under the stove and that helped the appearance slightly. 

I was told the granite should sit right
above the cabinet line, which would
 mean this is how is should look.
Granite overhangs too much on this side.


In Conclusion: 

Zero Star is scheduled to come back one last time in a few weeks to buff out two more minor chips. In conclusion, this has been the worst experience I have ever had dealing with contractors and will be looking for a house with granite already installed when I move again. My hubby's coworker had granite installed in his house around the same time but decided to go with a locally-owned company. He paid about $1,000 more, but comparing our experiences, it was worth it. I am absolutely not discouraging you purchase from the big time stores, but rather hope this give you newbie home-owners (like me) some information on what to look (or beware of).

xoxo
Jessie


Monday, July 28, 2014

10 Reasons Why I Started a Blog


At some point in the distant future, I hope to re-enter the workforce. Unless, of course, I've incurred a disgusting amount of money — probably with a scheme involving half-drunk water bottles and stale, under-the-car-seat French fries — or become my own boss — literally working for myself in a non-diaper-changing, laundry-folding, cookie-burning type of mom/wife way.

You: “But Jessie, why would you want to go back to work if you can live comfortably on one income?”

Me: “Validation.”

You: “Of what?”

Me: “I’m not totally sure. Maybe I see employers the same way I did my parents and teachers; adults whose approval I was desperately seeking.

You: “But you are the adult now …”

Me: “I didn't say it was logical. I think that little girl is still somewhere inside of me. I try to shut her up with popcorn and Disney movies.”

Moving on …  

When I do go back to work, I want to be able to show my future employer that I did something to stay current in my field. So, I started this blog to motive me to keep writing, taking photos, learning how to use websites, working on graphic design, etc. etc.. But that wasn't the only reason. Here is my top 10 reasons I started a blog.
  1.  To become a better writer.
  2. To make people laugh.
  3. To learn.
  4.  To help others learn.  (Mostly from my mistakes).
  5. To build my own self confidence.
  6. To reflect on my life.
  7.  To stay professionally relevant.
  8. To meet people with similar lifestyles.
  9. To become more comfortable with being known.
  10. To have fun!

Friday, July 25, 2014

Chicken Bake

Cheesy, chickeny, deliciousness wrapped in bread and baked. 


You guys. This recipe. It’s amazing. I’m just going to get down to the details because you should be making it tonight.

You'll need:

Frozen Chicken Breast – Tyson
Frozen Bread Loaf – Rhodes
Italian Dressing – Olive Garden * The dressing makes this bake, so get some good Italian dressing!
Pepper Jack Cheese – Castle Wood

Ingredients: Chicken, Bread, Italian Dressing & Pepper Jack Cheese

First, pull a loaf of frozen bread dough out of the freezer. Place it on some parchment paper and spray it down with some Pam. I suggest pulling out the dough at least 4 hours before you want to start your chicken. We usually eat dinner around 6 p.m., so on Chicken Bake nights, I pull it out around 1 p.m. so it's ready to use around 5 p.m.

After you get your bread out, it’s time to deal with the chicken. You can do this a few different ways:
  •  BBQ: De-thaw the chicken by running five pieces under water to get rid the ice, and marinate it in Italian dressing. Then follow basic chicken bbq instructions.
  • Bake: De-thaw the chicken by running five pieces under water to get rid the ice, put it in a glass pan, pour about half a cup of Italian dressing over it, cover with foil and bake at 350 degrees for 40 minutes or until juices run clear.
  • Crockpot: (My Favorite) De-thaw the chicken by running five pieces under water to get rid the ice and place them in the crockpot. Add ½ to 1 cup of Italian Dressing; enough to cover most of the pieces. Cook on high for 4 hours or low for 6 hours. Take a whisk and pull apart the chicken into small pieces.


Now the fun part!

Roll out the bread dough so it looks something like this:


Next, is my super special secret tip for making pretty bakes! Grab yourself the nearest ruler and press it gently down onto the tip of the bread making an indentation in the loaf. Using the line you just made as a guide, move the ruler down and make another indentation, and another, and another. Keep going until you have even lines down the entire loaf. 


Use a ruler to make even lines for braided bread.


Use a knife to make slits on both sides of the bread, about an inch or two deep.

Italian dressing, shredded chicken & pepper jack cheese. 

Next, measure out a cap of dressing and spread it even over the bread. The dressing will help the bread stick together better and it's also super yummy. Then add pepper jack cheese, your cooked, shredded chicken, more pepper jack cheese and finally, top with another cap of dressing.


Start from one end and braid it up altering sides. Make sure to really tuck the sides in so they don't pop out. The dressing helps them stick too. Did I say that already? Whatever. It's important. After it is braided, add another cap of dressing on the top, spreading a small layer evenly over the entire bake.


Put it in the oven and bake it! 375 degrees for 18-20 minutes or until the bread turns golden brown. When it's done, you have something that looks like this:


Omg.


Wait a few minutes for it to cool (if you can) because melted cheese burns the mouth. I've learned this the hard way. Multiple times. 

Use honey mustard to dip it in.
I'm a huge fan of honey mustard so I like dipping it in that. We've also used ranch. French's makes this honey mustard dipping sauce and I'm a huge fan.

If you're so lucky to have leftovers, wrap it in foil for tomorrow. I throw mine in the toaster and it re-heats wonderfully! Makes for a fantastic lunch the next day. 

Enjoy!


xoxo
Jessie

Thursday, July 24, 2014

Croutons & Chocolate Milk

My dear child is just over a year and a half. From what I've come to understand through various reading materials, he is stubborn as hell about what he eats because it’s apparently the only thing he can control at this age. So today for lunch, Mason has chosen seasoned croutons and chocolate milk. 


In his defense, they’re flipping amazing. Seriously. Don’t even bother with salad and tomatoes. You could just make a side dish with these.

However, he sees me bust out a stale rice cake with a dab of peanut butter and changes his mind about what he wants. My consequence for reminding him that his food is on his plate ...  


Anyway,

Olive Garden Seasoned Croutons – My local Sams Club sells them in a 32 oz. bag for just $5.88

TruMoo Chocolate Milk – local grocery store. Somewhere around $3-$4 ish.

Luckily my personal clean-up crew was there for the assist. 

I wonder how stinky the dog farts will be tonight ...


xoxo
Jessie 

Wednesday, July 23, 2014

Blog Virgin

So ... this blog writing is new for me. Wonder what type of trouble I can get into. Like my child who is currently trying to eat my lip gloss.